

The Photo Frosh Photo Challenge is a newbie’s attempt to complete all thirty of these prompts while (hopefully) learning something in the process.
Let’s chalk up this one as a valuable learning experience.
I’ll be honest: I was not looking forward to tackling the High Angle leg of this 30-part challenge.
Why, you ask?
Well, I happen to be deathly afraid of heights. The idea of leaning over a ledge with my camera and trying to take a photo paralyzed me with fear. (This could be why it’s been almost 5 months since I posted my last Photo Frosh Photo Challenge results.)
But I’m happy to say I completed the challenge without even having a panic attack! It’s the small victories that count, especially when the photos are nothing to write home about.
I decided that if I was going to travel to a higher-than-normal altitude, I wanted to do something a little more unique than simply capturing downtown Columbus. Many architectural photographers will use extremely long exposures to eliminate people from their photographs, so that only the buildings remain. The idea is that people will be moving so much and not standing still that a properly exposed long exposure won’t be able to capture them. I wanted to apply this idea to my high angle shot of Columbus, a challenge to myself since I’d never tried this before.
I knew I’d be shooting in the middle of the day, so to get a properly exposed long exposure I knew I would need a neutral density filter. I ended up using three (yes, three) Promaster ND4 72mm filters on my Tamron 17-50mm F/2.8, set my ISO to 100 and my aperture to f/32, and then rocked my shutter in bulb mode. I grabbed a new Manfrotto BeFree Travel tripod since it’s extremely lightweight and easy to use, and a Nikon MC-DC2 Remote Shutter Release, which was compatible with my Nikon D7000.
After I gathered my gear, I took some test shots outside the store. High Street is probably the busiest street in Columbus, especially in Clintonville where we’re located, so I knew trying to eliminate any moving cars and people from my frame would be a challenge, and would give me a good idea of how to accomplish it when I went out to shoot for real.

This was my first demo shot. I was only using two ND filters for this shot and felt it was a bit overexposed. However, I was pretty happy with how it turned out otherwise. There was definitely a ton of traffic happening when I took this shot. There are still traces of disembodied color floating in the air, the residual effects from passing cars, but I figured that if I slapped another ND filter on my lens I could achieve a better lit exposure and keep my shutter open for longer, thus eliminating some of those tracers.

I felt like this shot was much closer to what I wanted to achieve. It’s better exposed and there is very little visual residue from the passing cars. You’ll notice, however, the weird frame-y bits in the corner of the image. This is from the third ND filter, and the fact that my focal length was at 17 mm, meaning the lens was actually seeing the edges of the filter.
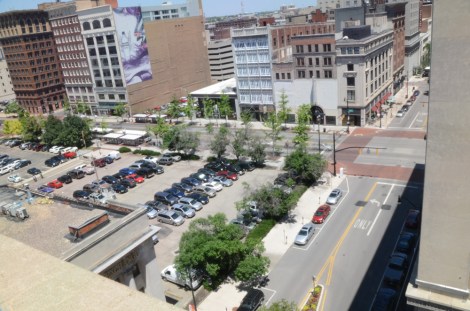
Once I ran enough test shots that I felt comfortable with the process, I ventured out to a parking garage in downtown Columbus. I drove to the top story of the garage, parked my car, set up my gear, and found the best angle to shoot High Street.

So, they might not be the most exciting shots, or the best exposed, or good photos in general, but I feel like I did pretty well, considering. However, I would do things a little differently next time, such as:
Shoot when it’s darker outside. That way I could have done a much longer exposure. You can see there are the ghostly remnants of some cars that slowed down or were stopped at a red light. The longest I felt I could keep the shutter open was a 50-count; otherwise, it would have been way overexposed. But had I shot this at night, I could have kept the shutter open for a much longer period of time. On the other hand, I’d be more likely to capture streamers of red taillights and white headlights. So there’s the trade-off. The best solution would maybe be to shoot during an overcast day, when the sun wasn’t so bright, unlike during midday in the summer.
Use a longer focal length. Afterwards, while I was thinking about, I wondered why I brought a 17-50mm lens. My Tamron lens has suited me well in a variety of shooting situations, such as during the Short North Photo Walk and when capturing texture (that F/2.8 is great to have), but it would have been nicer to have something with a longer focal range. I was shooting at F/32 the entire time, so the wide aperture wasn’t a concern of mine. I should have gone with the Tamron SP 70-300mm VC for its focal length and minimum aperture.
Research, research, research. I had a particular parking garage in mind since I knew where it was, but it turned out to have not the best views. I probably could have picked a better, and possibly higher, parking garage.
Height. The BeFree Travel Tripod was great for its light weight and ease of use, but it didn’t get as tall as I would have liked, especially to see over the garage’s walls. I would have preferred a taller tripod such as the Induro Carbon CT-414, which would have given me almost an additional two feet in height.
I hope you can learn from this post, and would love to see some high angle shots! Email michael@mpex.com with your high angle shots and we will feature them on the blog!
One thought on “Photo Frosh Photo Challenge #5: High Angle”